

The ONLY Volume Profile Levels That Actually Matter
If you’re using Volume Profile and still feel confused, you’re not alone.
Most traders mark every bump and curve on the profile… then wonder why price ignores all of them.
Here’s the uncomfortable truth:
Only a few Volume Profile levels actually move the market.
Everything else is visual noise.
Let’s break down the ONLY Volume Profile levels that truly matter, how institutions use them, and how you should trade around them.
1. Point of Control (POC) – The Market’s True Magnet

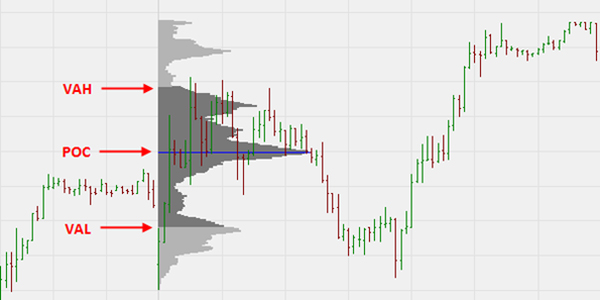
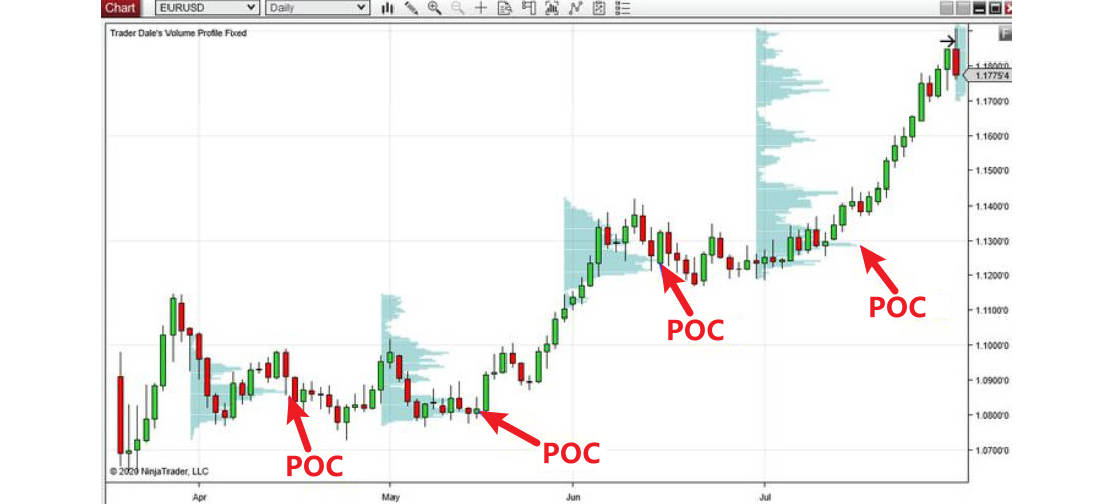
POC is NOT just another line.
It is the price where the maximum number of contracts were traded.
Think of it as:
- The fairest price
- The most agreed-upon value
- The center of gravity of the market
Why POC matters more than anything else
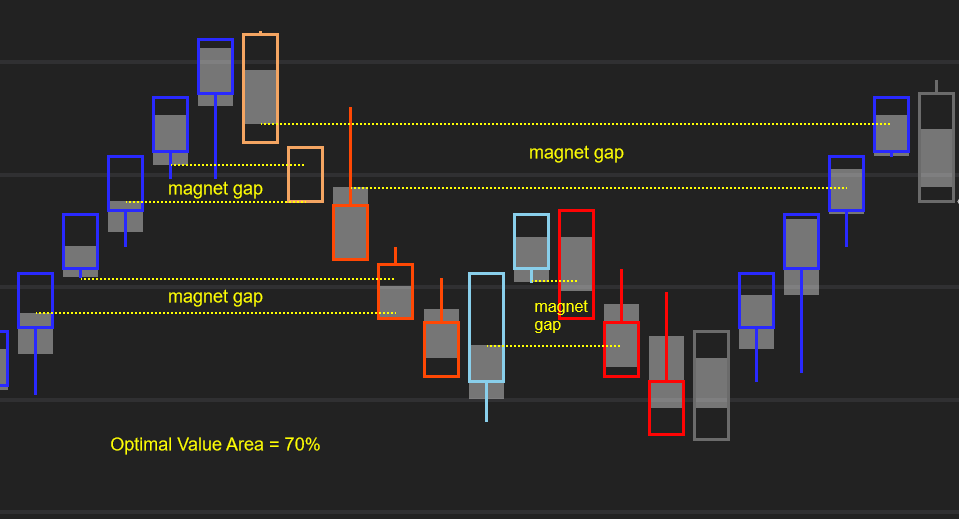
- Price is pulled toward POC like a magnet
- Markets rotate around it in ranges
- Strong trends either reject it violently or accept it fully
How smart money uses POC
- Accumulation happens near POC
- Break + acceptance above POC → bullish continuation
- Break + acceptance below POC → bearish continuation
If price is chopping and you don’t know direction—POC already knows.
2. Value Area High (VAH) – Where Sellers Wake Up
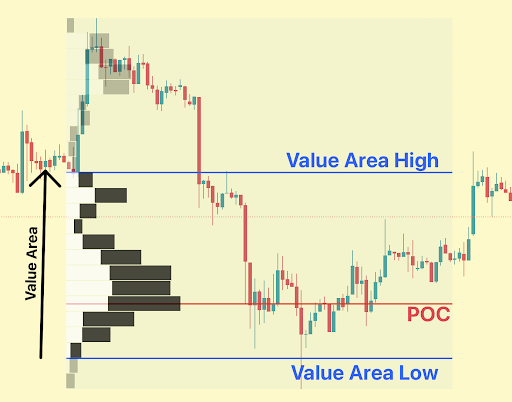
VAH marks the upper boundary of fair value (top 70% of volume).
Above this level:
- Price is considered expensive
- Sellers start defending
- Breakouts get tested hard
What actually works at VAH
- First rejection → high-probability short
- Acceptance above VAH → strong bullish signal
- VAH → POC rotation is one of the most reliable intraday moves
Most fake breakouts die at VAH.
3. Value Area Low (VAL) – Where Buyers Step In
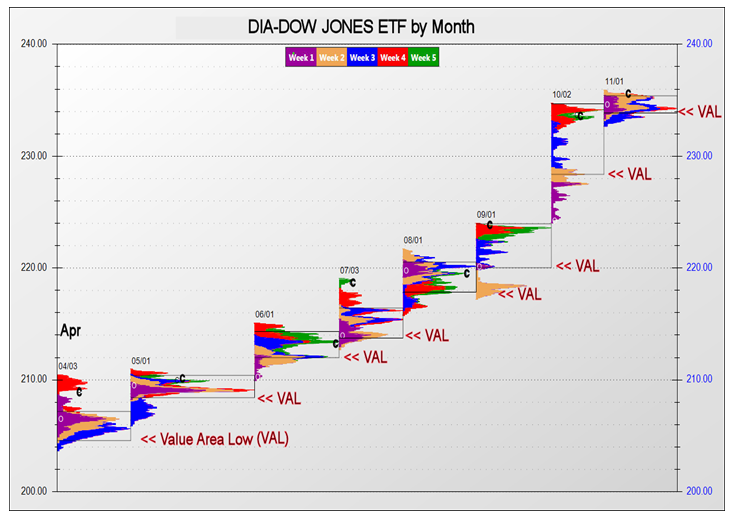

VAL is the lower boundary of value.
Below this level:
- Price is cheap
- Buyers hunt liquidity
- Stops are taken before reversals
High-probability VAL behavior
- Sharp rejection → bounce toward POC
- Acceptance below VAL → trend day down
- Best place to spot trap sellers
If VAH is seller territory, VAL is buyer territory.
4. Low Volume Nodes (LVN) – The Fast Lanes
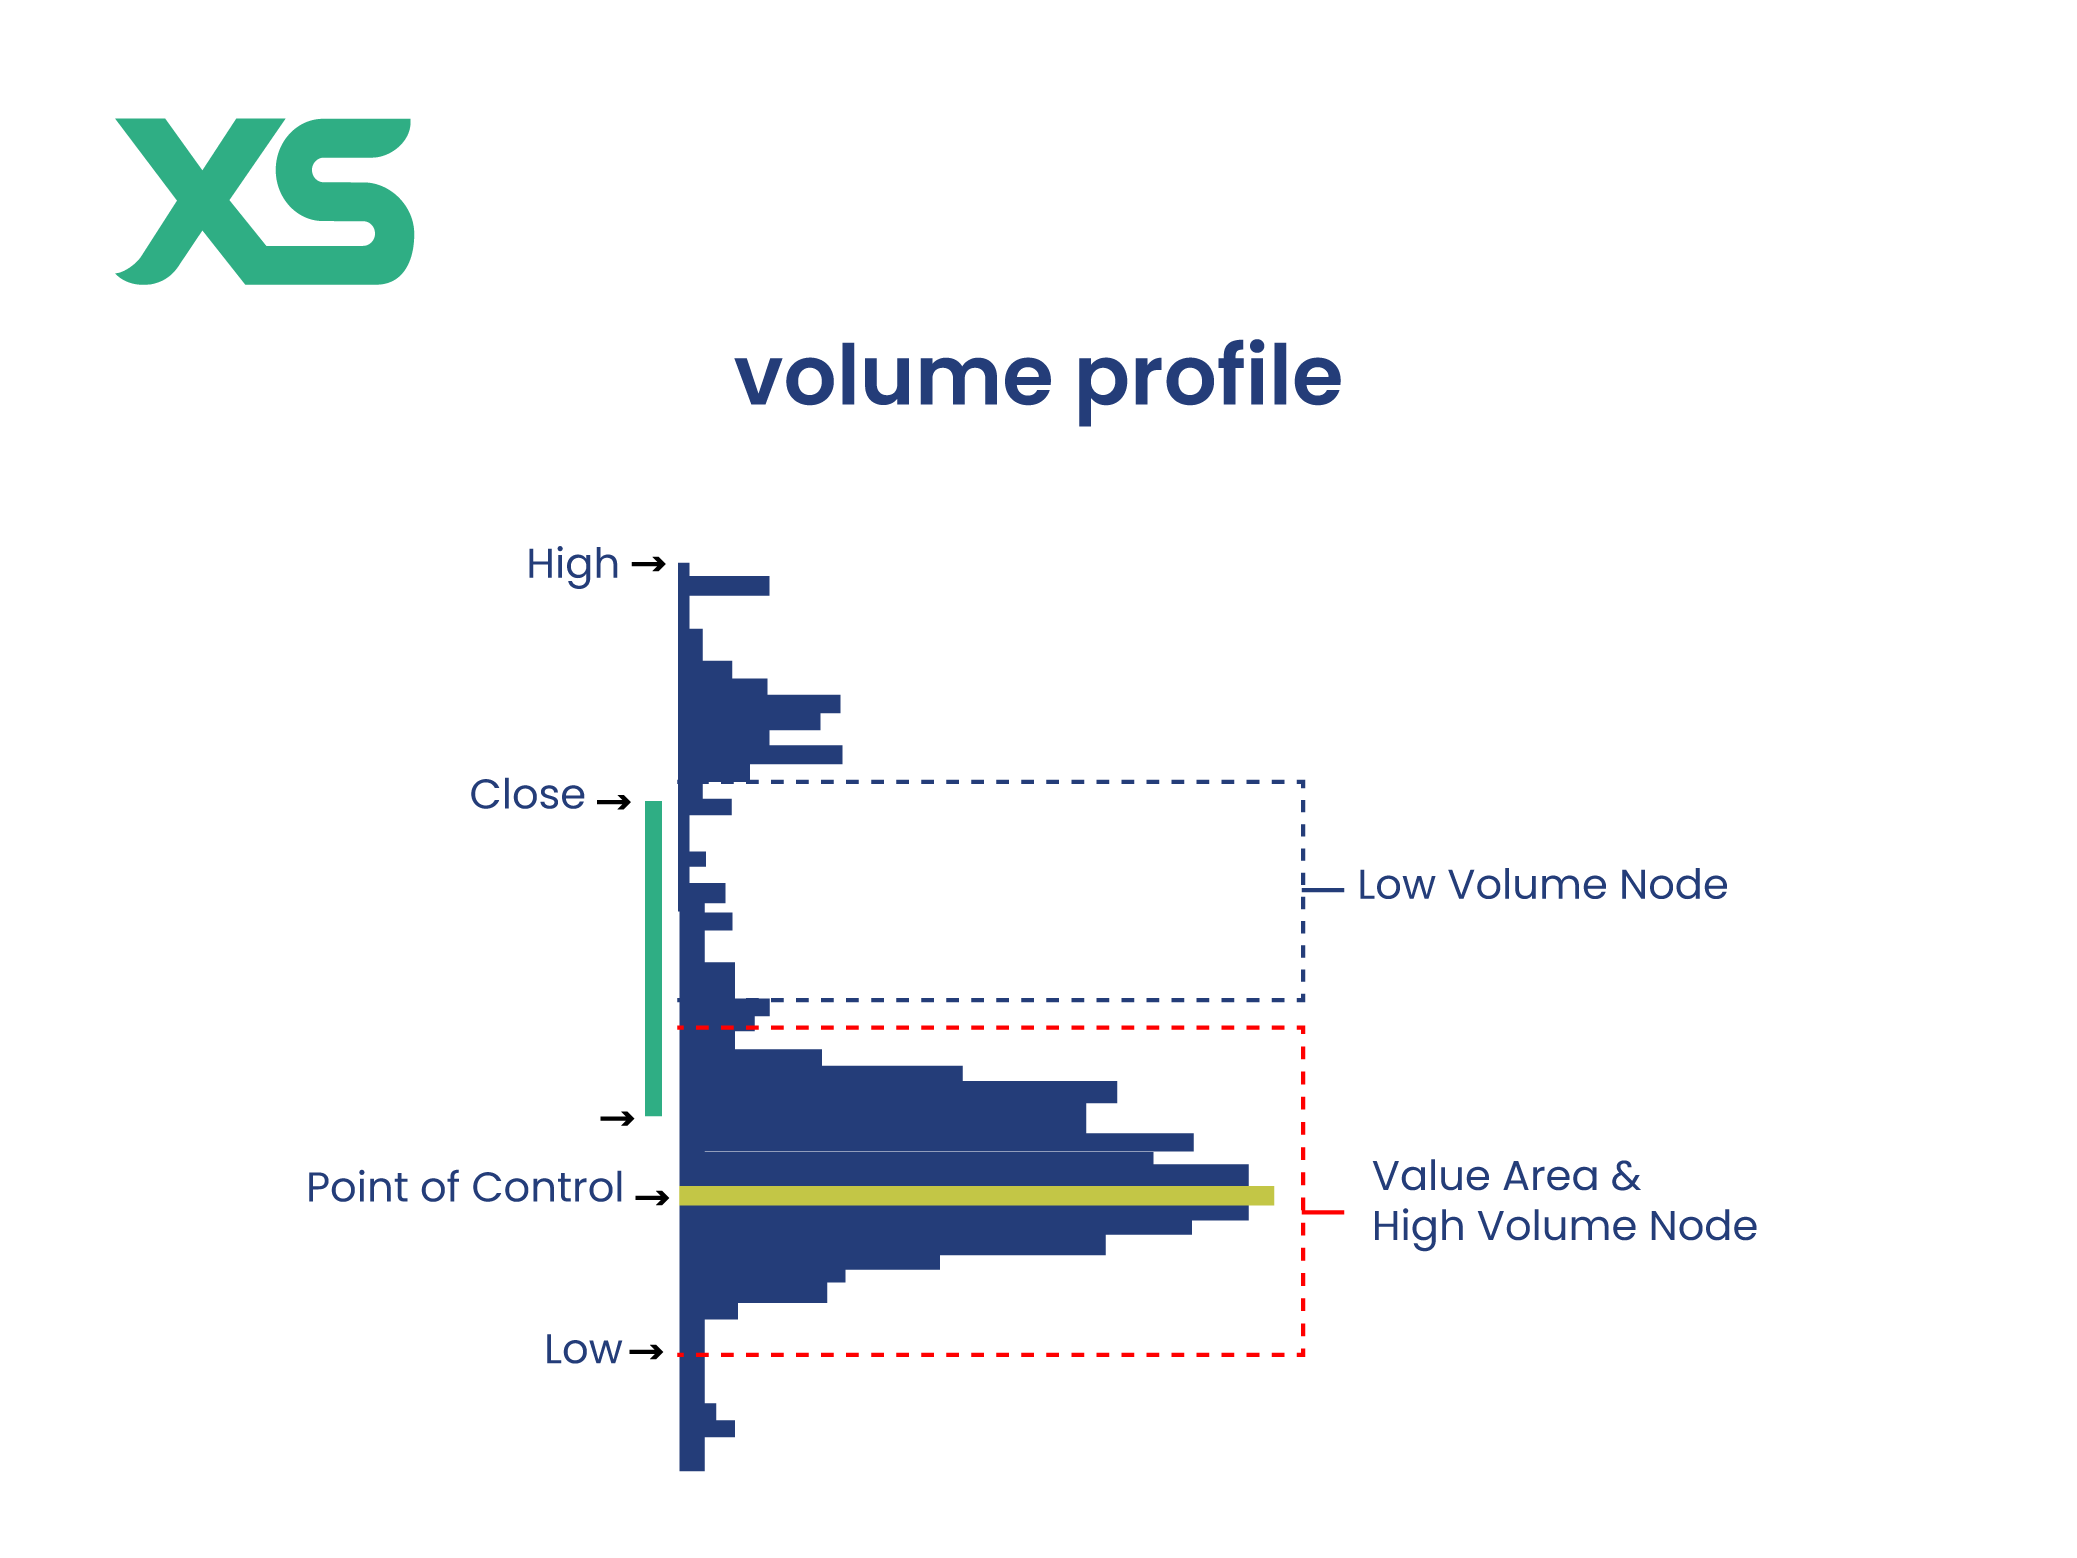
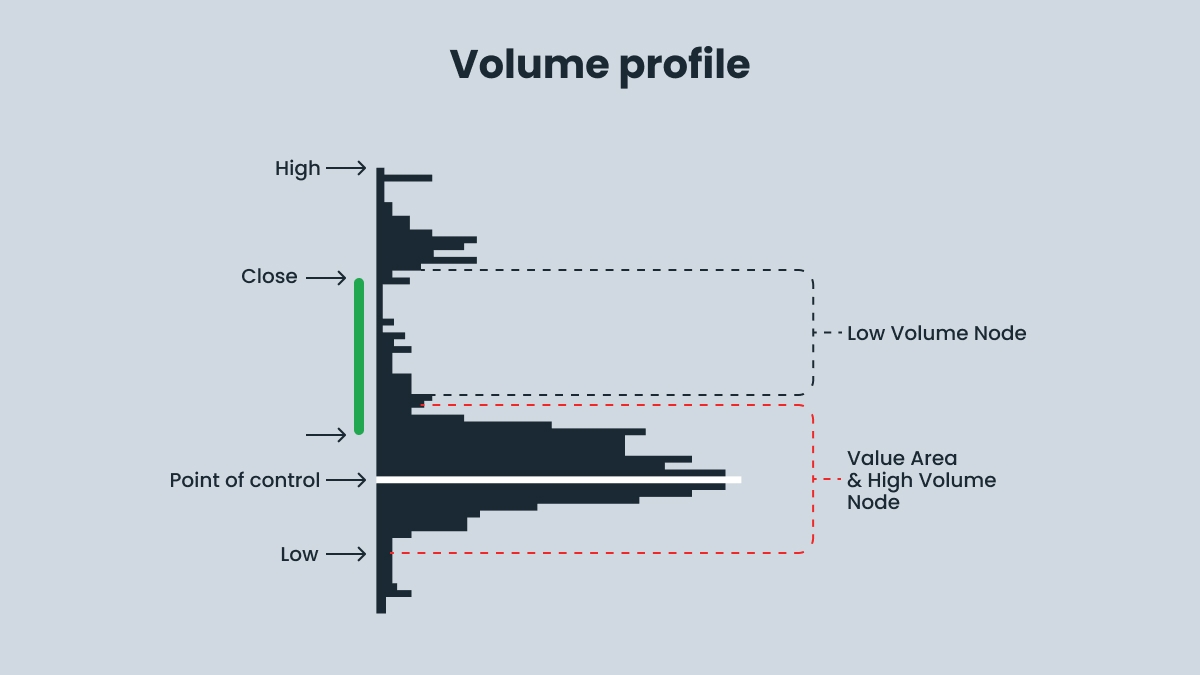
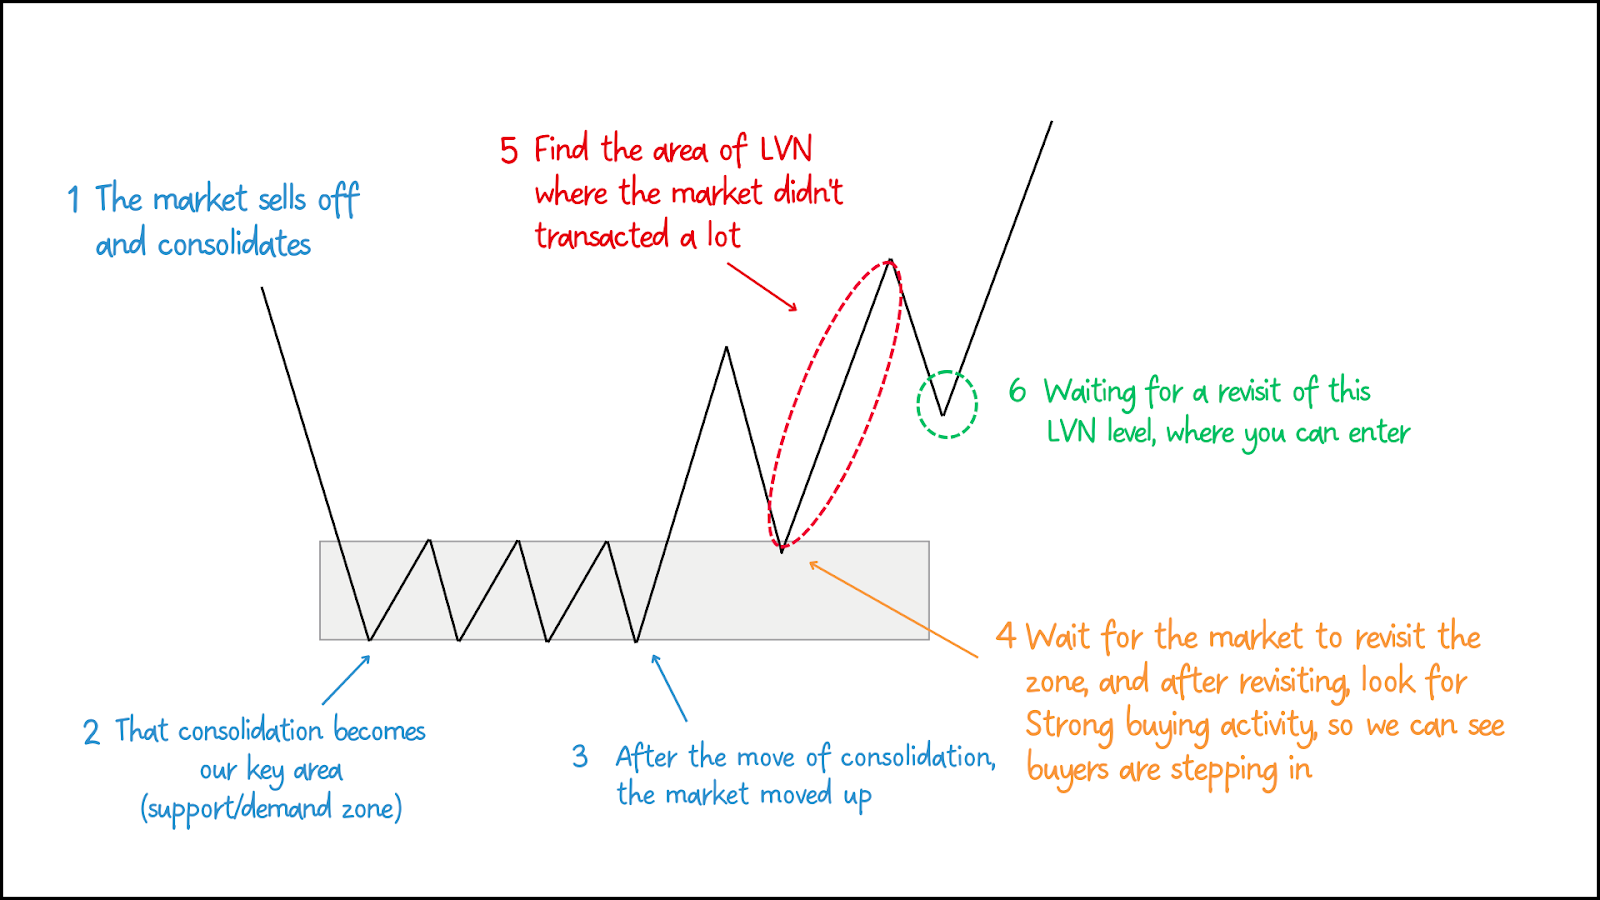
LVNs are areas where the market did NOT like to trade.
Price doesn’t slow down here.
It moves fast.
Why LVNs are deadly accurate
- Price rejects or slices through—no in-between
- They act as decision points, not consolidation zones
- Perfect for breakout or rejection trades
One golden rule
Never expect consolidation at LVN.
Either fade it instantly or ride the impulse.
5. Naked POC – The Level Institutions Remember


A Naked POC is a POC that hasn’t been retested yet.
Institutions do not forget these levels.
What happens when price returns
- Violent reaction
- Sudden reversals
- Algorithmic defense
One touch is often enough to generate a tradeable move.
Levels You Can Safely IGNORE
Let’s be honest.
These waste time for most traders:
- Random volume bumps
- Mid-value micro levels
- Over-anchored profiles without context
If it’s not:
- POC
- VAH / VAL
- Clear LVN
- Naked POC
…it probably doesn’t matter.
The Real Edge (Most Traders Miss This)
Volume Profile levels do NOT work alone.
They become powerful only when combined with:
- Market structure
- Higher-timeframe bias
- Liquidity context
- Rejection or acceptance behavior
Volume Profile doesn’t predict.
It reveals where decisions are forced.
Final Thought
If you mark only these five levels, your charts will:
- Look cleaner
- Make more sense
- Produce fewer but higher-quality trades
Remember:
The market is not random.
It just respects fewer levels than you think.